How It Works
Gift Registry is a free universal gift registry for any occasion — whether you're building a wedding registry, a baby shower registry, a birthday wishlist, or a Christmas wishlist. Unlike retailer-specific registries (Amazon, Target, Zola), you're never locked into one store: mix gifts from any website in a single list. Guests can claim gifts anonymously, so you'll never know who's buying what until your special day. No app download required — it works on any device, in any browser, completely free.
🎁 Creating your registry
-
1Create a free account
Register with a username, email address, and password at register. It only takes a minute. A verification email is sent to your address — click the link to activate your account. No account is created until you verify.
-
2Create your registry
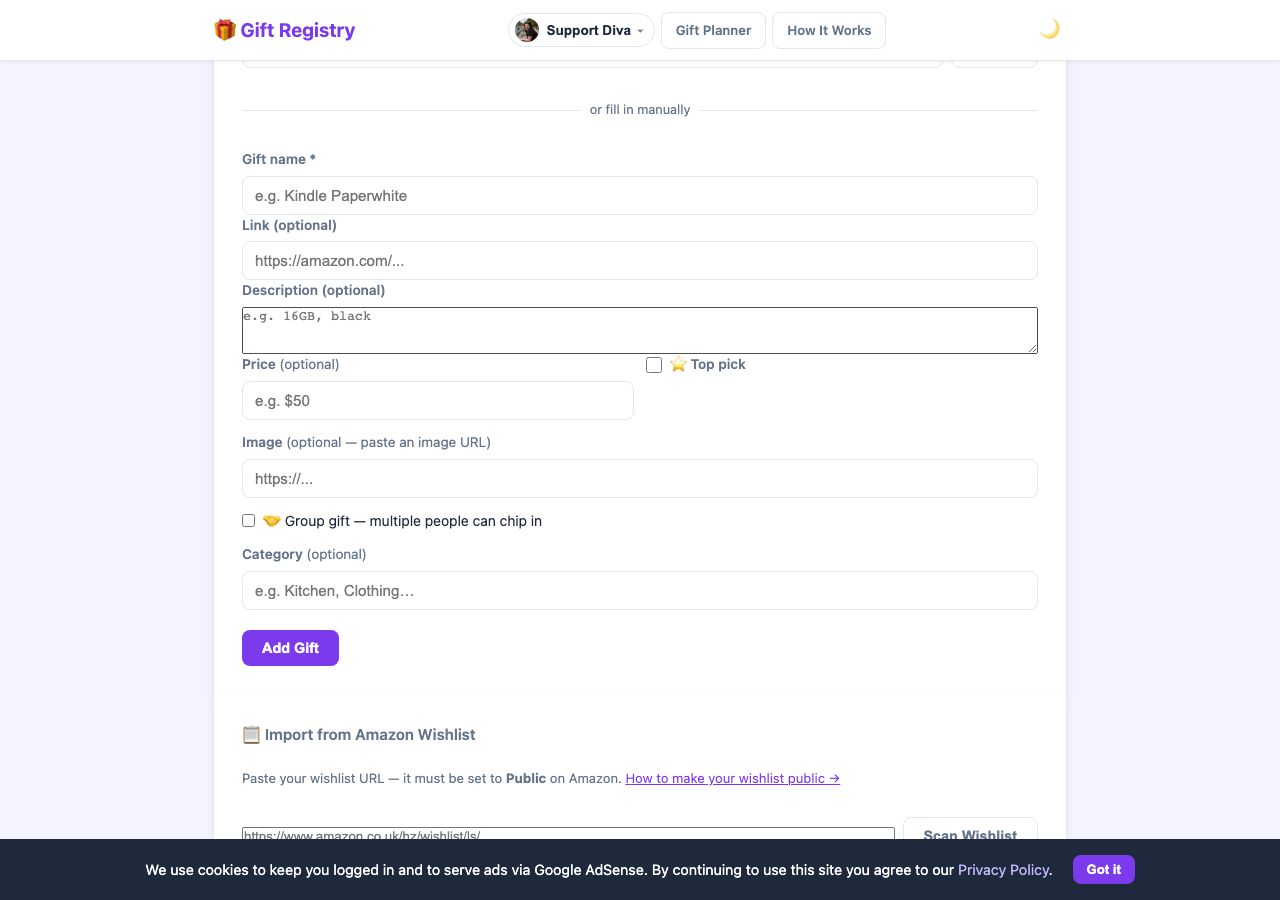
Give your registry a name (usually your own name) and start adding gifts. You can paste a product URL to auto-fill the name, description, price, and image — or fill everything in manually.
-
3Share the link
Click Share Link on your registry page and send the link to friends and family. Anyone with the link can see your list and claim gifts.
-
4Sit back and wait
That's it! You won't see who has claimed what — the surprises are kept intact. You'll get an email notification each time a gift is claimed, without any names.
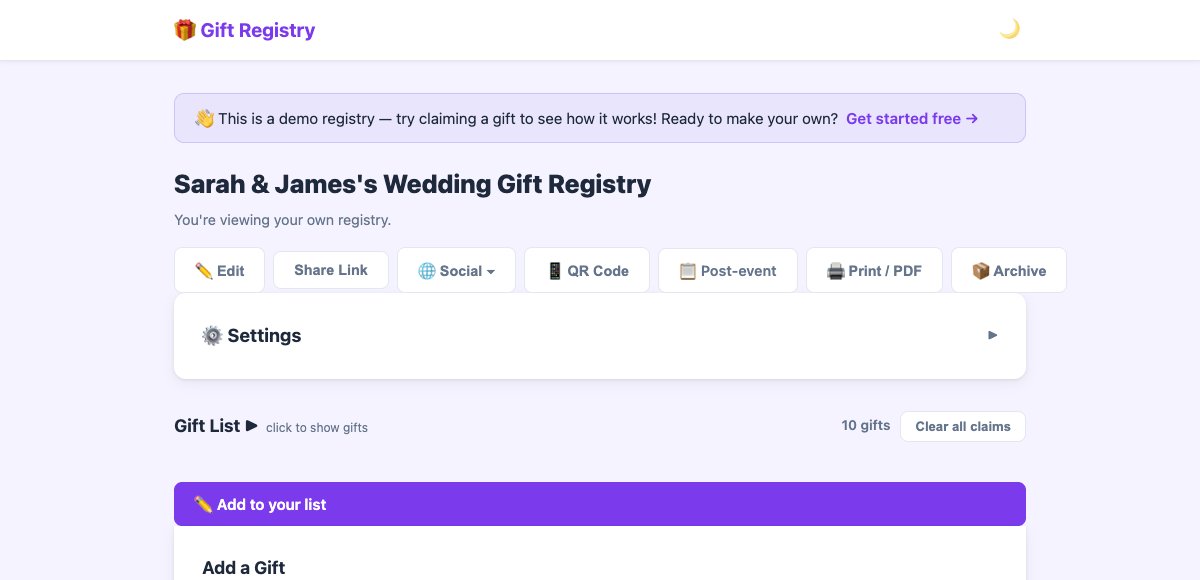
Owner view: your toolbar gives you full control over your registry.
📋 Import from Amazon Wishlist
Already have an Amazon wishlist? Import all your items into your Gift Registry in one go — no copy-pasting needed.
-
1Make your Amazon wishlist Public
Your wishlist must be set to Public before it can be scanned. See the steps below to change the privacy setting.
-
2Copy your wishlist URL
Open your Amazon wishlist in a browser. Copy the full URL from the address bar — it will look something like
https://www.amazon.co.uk/hz/wishlist/ls/ABC123XYZ. -
3Paste it into Gift Registry
On your registry page, find the 📋 Import from Amazon Wishlist panel (visible when you're logged in as the owner). Paste the URL and click Scan Wishlist.
-
4Select the gifts you want
A panel shows all items found. Every item is pre-selected — uncheck any you don't want to add. Then click Add N Gifts and they'll all be imported at once.
- Go to your Amazon wishlists and open the one you want to import.
- Click the ⋮ More menu (three dots) near the top of the list, then choose Manage list. On some versions of Amazon, look for a pencil ✏️ icon or List Settings.
- Find the Privacy setting and change it from Private to Public.
- Save your changes.
- Come back to Gift Registry and scan the wishlist URL.
You can set it back to Private afterwards — the gifts are already in your registry.
- Works with Amazon UK, US, Australia, Canada, Germany, France, Japan, India, Spain, and Italy.
- Up to 20 items are imported per scan. If your wishlist is longer, you can run the scan again after removing already-imported items.
- Items where Amazon blocked the details import will still appear with their URL so you can fill in the name and price yourself.

Paste your Amazon wishlist URL and click Scan Wishlist to import up to 20 items at once.
🔖 Browser bookmarklet — add gifts in one click
Tired of copy-pasting product links? Install the bookmarklet once and you can add anything to your registry without ever leaving the shopping site.
-
1Get your bookmarklet
Go to Account and click Get your bookmarklet →. Select the registry you want to add gifts to.
-
2Drag it to your browser toolbar
Drag the 🎁 Add to Registry button into your browser's bookmarks bar. (If dragging doesn't work, right-click it and choose Bookmark this link.)
-
3Visit any product page and click it
Browse to any product on Amazon, ASOS, Kmart — anywhere. Click the bookmarklet in your toolbar and a small panel pops up with the product name, price, and image already filled in.
-
4Click Add Gift
Edit the details if needed, then click Add Gift. You'll see Added! ✓ and the panel closes — the item is instantly in your registry.
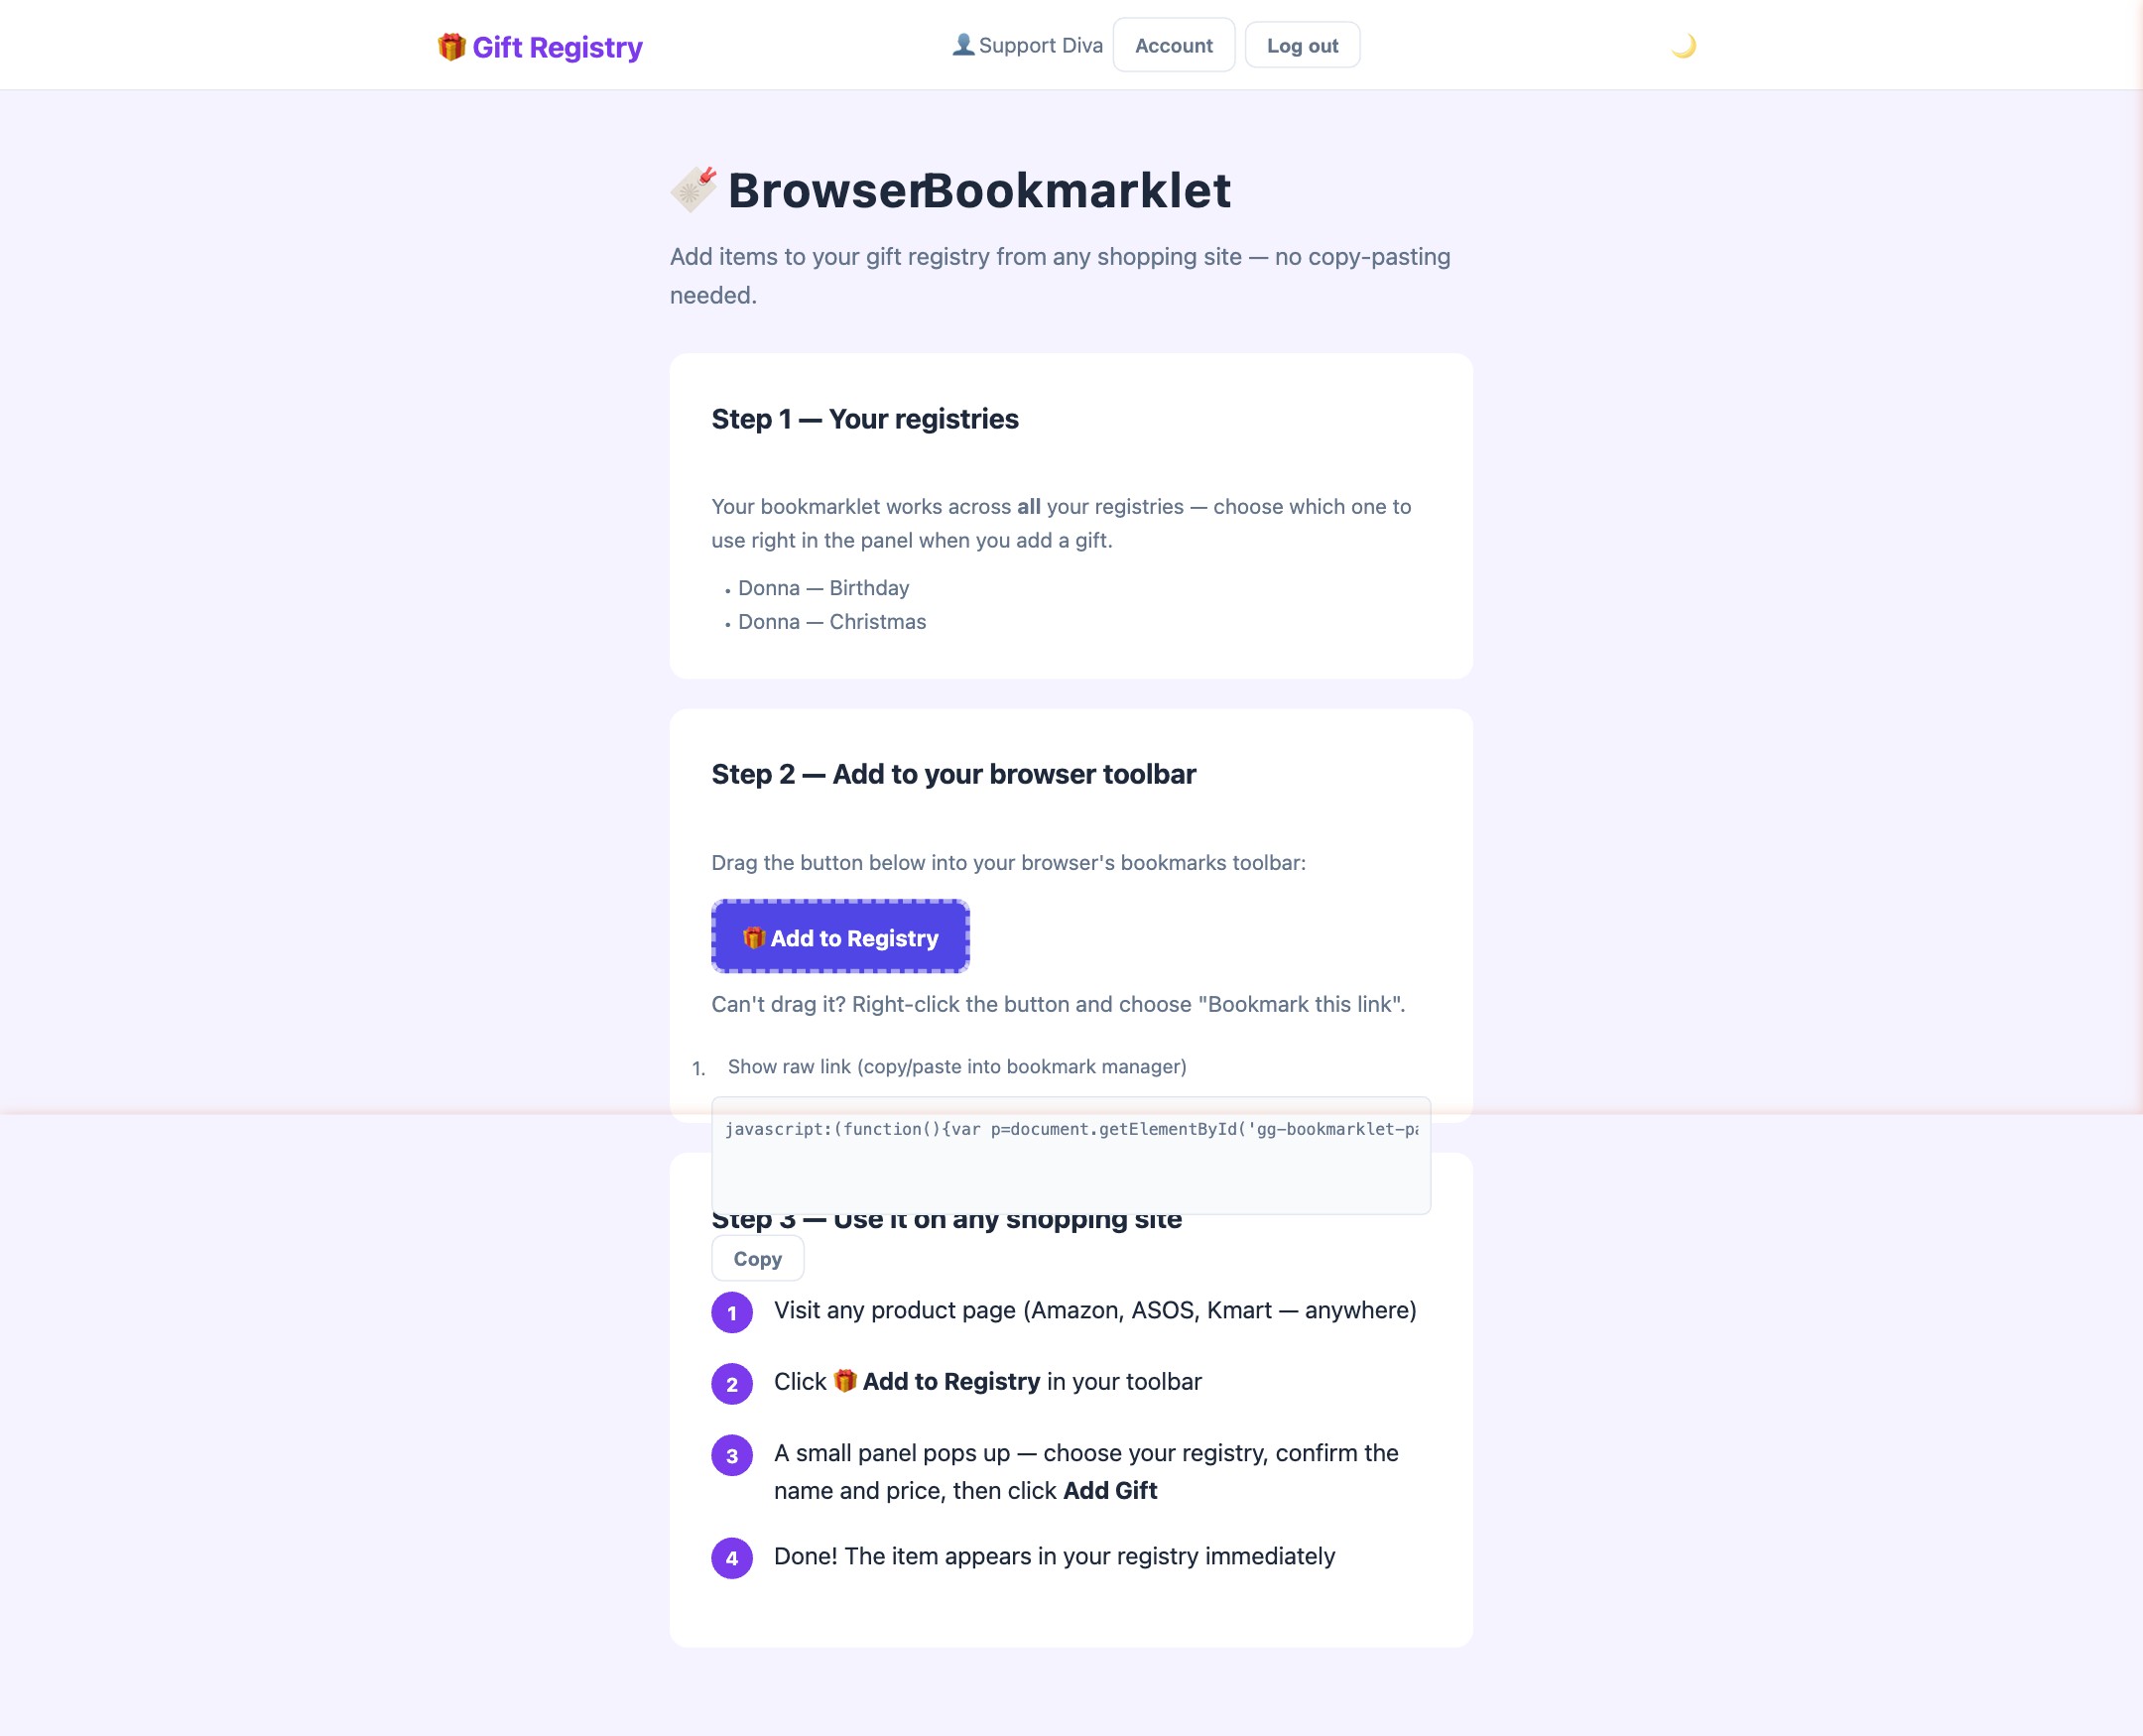
The bookmarklet setup page — select your registry and drag the 🎁 Add to Registry button to your browser toolbar.
🧩 Chrome extension — add gifts from your toolbar
Prefer a permanent button over a bookmark? The Gift Registry Chrome extension does the same job as the bookmarklet — one click to add whatever you're browsing — but it lives in your toolbar, is always visible, and installs straight from the Chrome Web Store.
-
1Install it from the Chrome Web Store
Add Gift Registry to Chrome → It's free. Then pin it to your toolbar: click the puzzle-piece 🧩 icon next to the address bar, find Gift Registry — Add to Wishlist, and click the 📌 pin — the 🎁 button will stay visible on every site.
-
2Make sure you're signed in
The extension reuses your existing giftgiving.fun login — there are no passwords or tokens to set up. If you're signed in on the site, the extension just works.
-
3Browse to any product and click the icon
On Amazon, ASOS, Kmart — anywhere — click the 🎁 toolbar icon. A popup reads the product's name, price, and image automatically.
-
4Pick a registry and add it
Choose which registry to add to, tweak the details if you like, and click Add Gift. It's in your registry instantly.
🛍️ Giving a gift
-
1Open the registry link
Click the link shared by the person whose gift registry you want to browse. No account needed — your name is only requested when you click to claim a gift, not just for browsing.
-
2Pick a gift
Browse the list and click I'll give this! on the gift you want to give. It will be marked as claimed so nobody else picks the same thing.
-
3Track your gifts
Click My Gifts in the top navigation to see all the gifts you've claimed across any registry. Once you've bought a gift, check it off as Got it! to keep yourself organised.
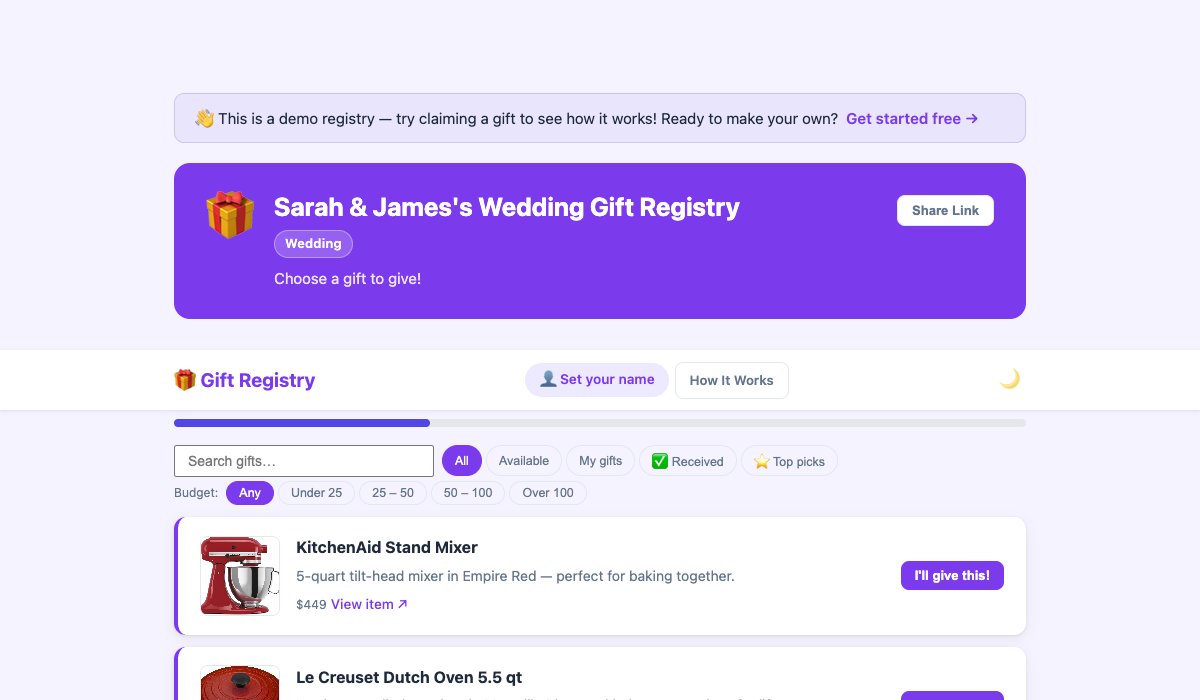
Guest view: browse the gift list, filter by budget, and claim a gift in seconds.
🗂️ Gift list
The gift list is expanded by default so you can start browsing straight away. You can collapse it and re-expand it at any time using the heading.
-
1Browse gifts
The Gift List ▼ section is open when you arrive. Use the budget and category filter pills above the cards to narrow things down.
-
2Claim or contribute
Click a gift card to claim it or chip in to a group gift. Everything works the same whether you're logged in or visiting as a guest.
-
3Collapse to scroll back up
Click the Gift List ▲ heading to fold the list away. Handy on longer registries when you want to get back to the registry details quickly.
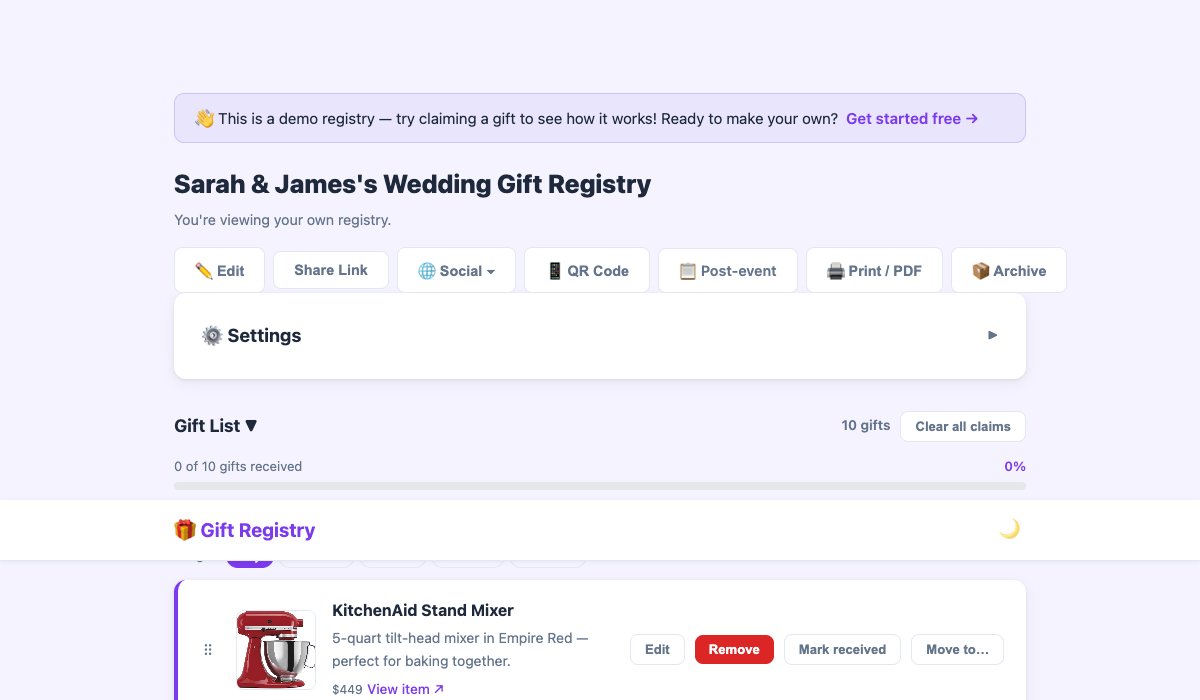
Owner gift cards include edit, remove, reorder, and mark-received controls.
🛒 Quantity tracking
Need six wine glasses or a dozen party favours? Set a quantity on any gift so multiple guests can each claim one unit — no doubling up, no gaps.
-
1Set a quantity when adding or editing a gift
The Quantity field on the add/edit gift form defaults to 1. Change it to however many you need — 6 wine glasses, 10 party favours, whatever fits your occasion.
-
2Guests claim one unit at a time
Each guest who clicks I'll give this! claims one unit. The gift card updates to show how many have been claimed and how many are still available — e.g. 🛒 2 of 6 claimed — 4 left.
-
3When all units are taken, the gift closes
Once every unit has been claimed the gift shows All taken and the claim button disappears — so nobody claims a unit that doesn't exist.
-
4Each claimer can unclaim their own unit
Changed your mind? Each person can withdraw their own claim independently — freeing up that unit for someone else without affecting anyone else's claim.
📂 Gift sections
Give gifts a category label, then switch the gift list to 📂 By category to group everything into named sections — making long lists much easier to browse.
-
1Add a category to any gift
When adding or editing a gift, type anything you like into the Category field — "Kitchen", "Bedroom", "Toys", "Books", whatever makes sense for your registry.
-
2A view toggle appears
As soon as at least one gift has a category, a 🔥 Most wanted / 📂 By category toggle appears above the list. Most wanted shows one flat list with your top picks first; By category groups cards under labelled section dividers. Your choice is remembered for next time.
-
3Uncategorised gifts collect under "Other"
Any gift without a category is grouped at the end under an Other section, so nothing falls through the cracks.
-
4Drag a gift to move it (owners)
In the 📂 By category view, drag any gift card onto a different section to recategorise it instantly — no need to open the edit form.
🗒️ Gift Planner — organise what you're giving
The Gift Planner is your personal shopping list for other people's registries. Keep track of every gift you plan to give across all your friends and family — all in one place.
-
1Open the Gift Planner
Sign in and click Gift Planner in the navigation bar. (You need a free account, but recipients don't.)
-
2Create a plan for each recipient
Click + New Plan and enter the recipient's name. You can optionally link their Gift Registry account if they have one — this lets you browse their wishlist directly from the planner.
-
3Add items
Add individual gift ideas to the plan — name, URL, price, and image. Items can be added manually or sourced from the linked registry.
-
4Mark as bought
Tick the Bought checkbox next to any item once you've purchased it. The plan keeps a running tally so you always know where you're up to.

Gift Planner: organise everything you're giving across all your friends and family in one place.
⭕ Circles & Secret Santa
Circles let you organise a group of people — family, friends, colleagues — and optionally run a Secret Santa draw so everyone knows who they're buying for.
- Create a Circle — go to My Circles and click + New Circle. Give it a name (e.g. "McGahan Family Christmas") and optionally enable Secret Santa and set a budget.
- Add members — click + Invite Member on the circle page. Search for existing giftgiving.fun users by name or email and click Add, or send an email invite to someone not yet on the site.
- Link your registry — each member links one of their registries to the circle. This is what Secret Santa uses to know what to buy. Click Link my registry on your member card.
- Run the Secret Santa draw — once there are at least 3 members and everyone has linked a registry, the circle owner clicks 🎅 Run Draw. Each member gets an email with their assignment and a direct link to the giftee's registry.
- See your assignment — after the draw, visit the circle page to see who you're buying for and a link straight to their registry.
🤝 Group gifts
Some gifts are too big for one person — a group gift lets everyone chip in together.
-
1Owner marks a gift as a group gift
When adding or editing a gift, tick the Group gift — multiple people can contribute checkbox. The gift will be badged with 🤝 on the registry.
-
2Guests click "I'll contribute!"
Instead of the usual I'll give this! button, group gifts show an I'll contribute! button. Any number of people can click it — the gift stays open for more contributors.
-
3Everyone sees the headcount grow
The registry shows how many people have signed up to contribute (e.g. 3 people contributing). Changed your mind? Click Withdraw to remove yourself.
Tick the Group gift checkbox when adding a gift — multiple people can then chip in.
💰 Cash funds — honeymoon, home deposit, big-ticket dreams
Some things can't be wrapped. A cash fund lets guests chip in money toward a goal — a honeymoon, a house deposit, a charity donation — sent directly to you with 0% fees. Gift Registry never touches the money.
-
1Add your payment link
Set it once in Account → 💰 Cash funds and every registry you own uses it automatically — or set a different link for a specific registry in that registry's Settings → 💰 Cash funds (handy for couples using a joint account). Paste one of the following. This is where contributions land — pick whichever you already have:
- PayPal.Me link — free to create in a minute at paypal.com/paypalme if you have a PayPal account. Looks like paypal.me/yourname. Guests can pay with their PayPal balance or a card.
- PayID — if you bank in Australia, you likely already have one (or can set one up in your banking app under Settings → PayID). It's just your email address, mobile number, or ABN linked to your account. Guests copy it into their own banking app and transfer instantly — usually with no fees at all.
- Stripe Payment Link — for owners who already have a Stripe account (it's a business tool, so this one's rare). Create a Payment Link in your Stripe dashboard and paste the buy.stripe.com/… URL.
-
2Create the fund
When adding a gift, tick 💰 Cash fund, give it a name like "Honeymoon Fund", and optionally set a goal amount. The fund appears on your registry with a progress bar.
-
3Guests contribute in two clicks
Guests pick an amount ($25 / $50 / $100 or their own), pay you directly — PayPal opens with the amount pre-filled, or they copy your PayID into their banking app — then click I've sent it ✓ so the progress bar updates.
What your guests see
Nothing to set up on their end — the registry walks them through it. If a relative asks "how do I pay?", here's exactly what happens:
-
1Tap the fund's Contribute button
The cash fund shows on your registry with a progress bar and a Contribute button instead of the usual claim button.
-
2Pick an amount
They tap a quick amount ($25 / $50 / $100) or type their own.
-
3Pay you directly
Depending on the link you saved: a Pay with PayPal button opens PayPal with the amount already filled in, a Stripe link opens its checkout, or — for PayID — they copy your PayID and send the transfer from their own banking app.
-
4Tap I've sent it ✓
This nudges your progress bar along. It's an honour-system tally — the real money has already landed in your PayPal or bank account.
👥 Co-owned registries
Couples, parents, or housemates can share ownership of a single registry so both people can manage it together.
-
1Invite a co-owner
On your registry page, open Privacy & Access and enter the username of the person you'd like to add. They'll receive an email notification.
-
2Both owners can manage the registry
Co-owners can add, edit, and remove gifts, update registry settings, and share the link — exactly the same as the primary owner.
-
3The registry appears in both accounts
Co-owned registries show up in the My Registries list for both owners, clearly badged as co-owned.
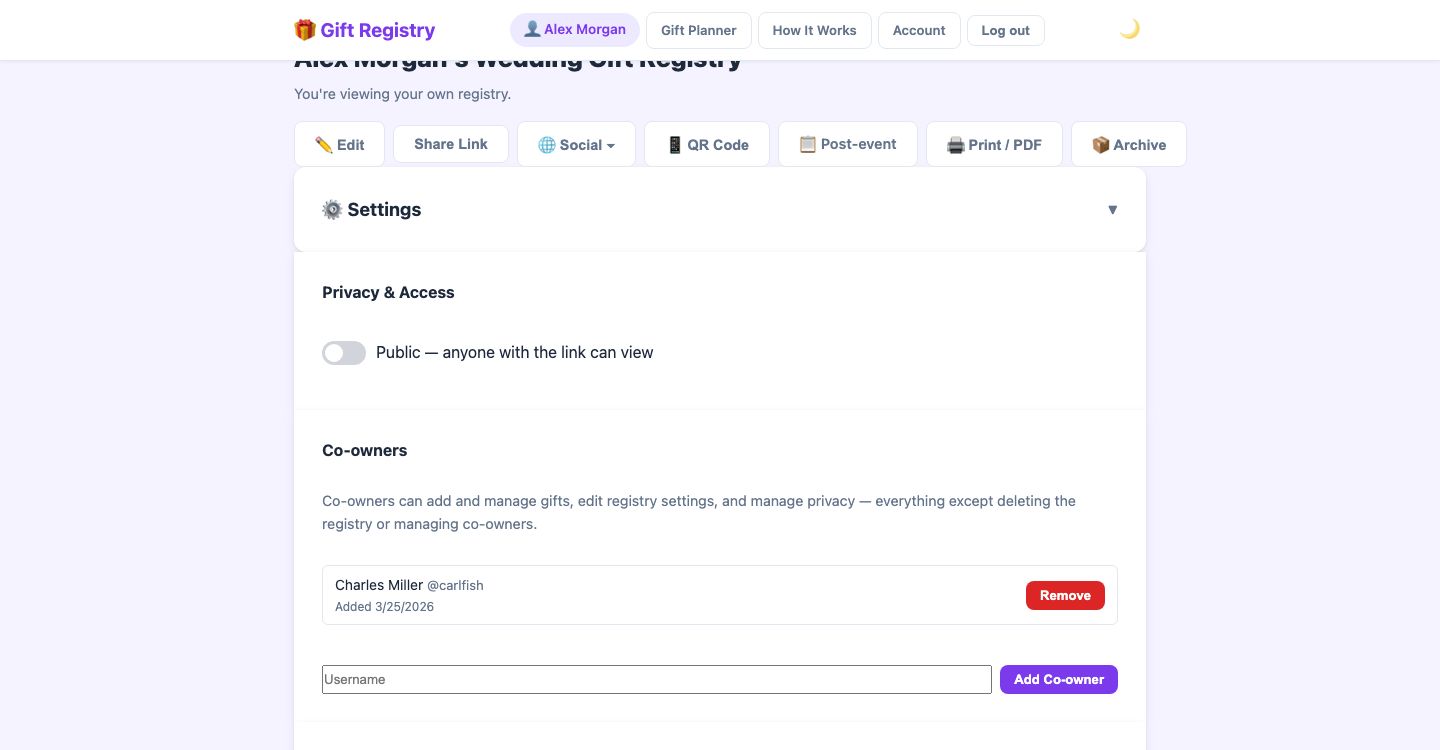
The Co-owners section in your registry settings — add anyone by username and they'll have full management access.
📅 Event reminders
Set an event date on your registry and Gift Registry will automatically remind everyone at the right time — no chasing needed.
-
1Add your event date
When creating or editing your registry, enter the occasion type and date (e.g. "Wedding — 14 June 2026"). This enables automatic reminders.
-
2Reminder emails go out automatically
At 30 days before the event and again at 7 days before, reminder emails are sent to: the registry owner ("Your Wedding is in 30 days — check your registry!"), anyone who has claimed a gift (naming the specific gift they've promised), and guests who were privately invited.
-
3Sit back — the nudges happen automatically
Once the event date is set you don't need to do anything else. Each reminder is sent only once (no duplicate emails) and respects unsubscribe preferences.
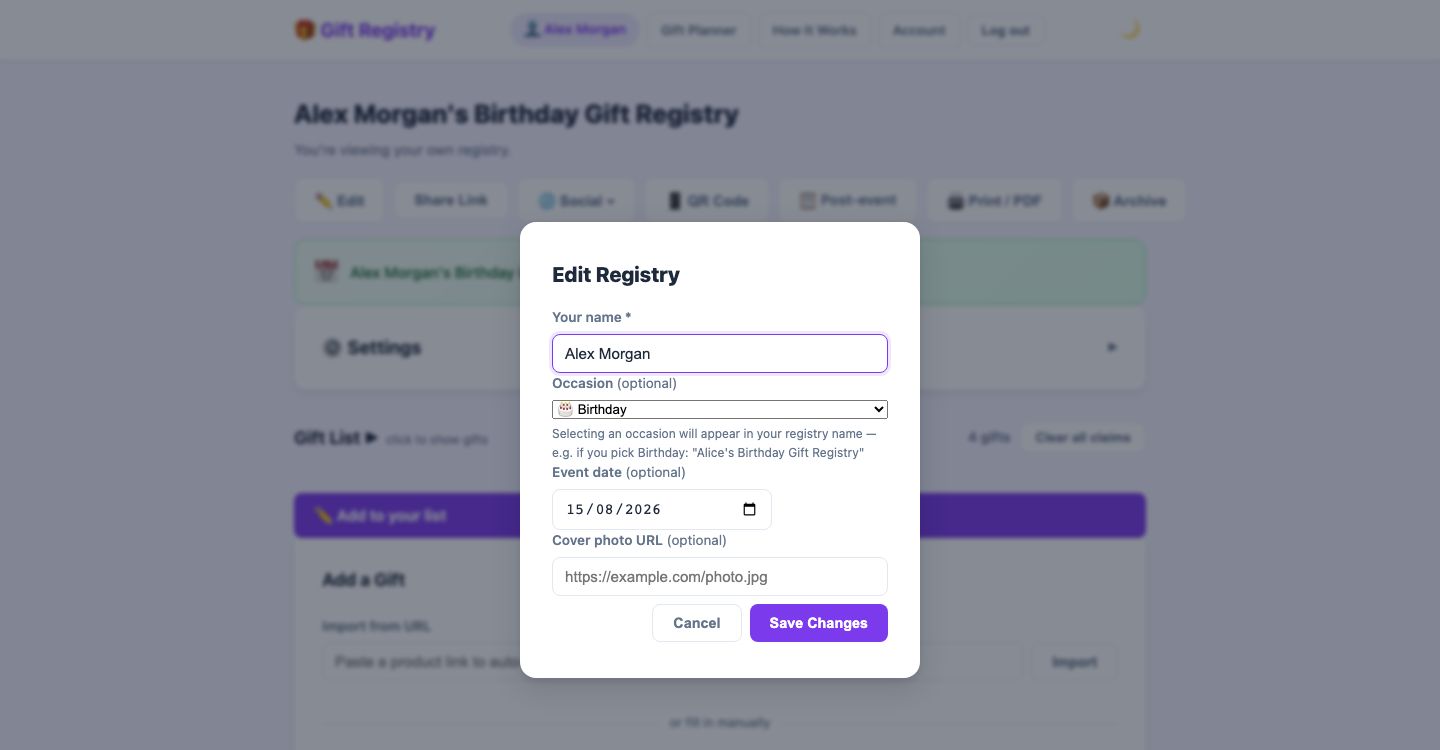
Set an event date when editing your registry — Gift Registry handles the reminder emails automatically at 30 and 7 days out.
📋 After the Event: mark received & send thank-you notes
Once the big day is over, use the post-event view to keep track of which gifts you've received and send a personal thank-you note to each giver.
-
1Open the post-event view
Once at least one gift has been claimed, a 📋 Post-event View button appears in the stats card on your registry page. Click it to open a table of every claimed gift, each showing its current status — Claimed or Received.
-
2Mark gifts as received
Once a gift arrives, click Mark received next to it. The status badge updates from 🎁 Claimed to ✅ Received inline — no page reload needed. A summary bar at the top shows your running tally of claimed vs received.
-
3Send a thank-you note
Click Send thank you 💌 next to any gift. A personalised message is pre-written for you — edit it however you like, then send. The note goes straight to the claimer's email address.
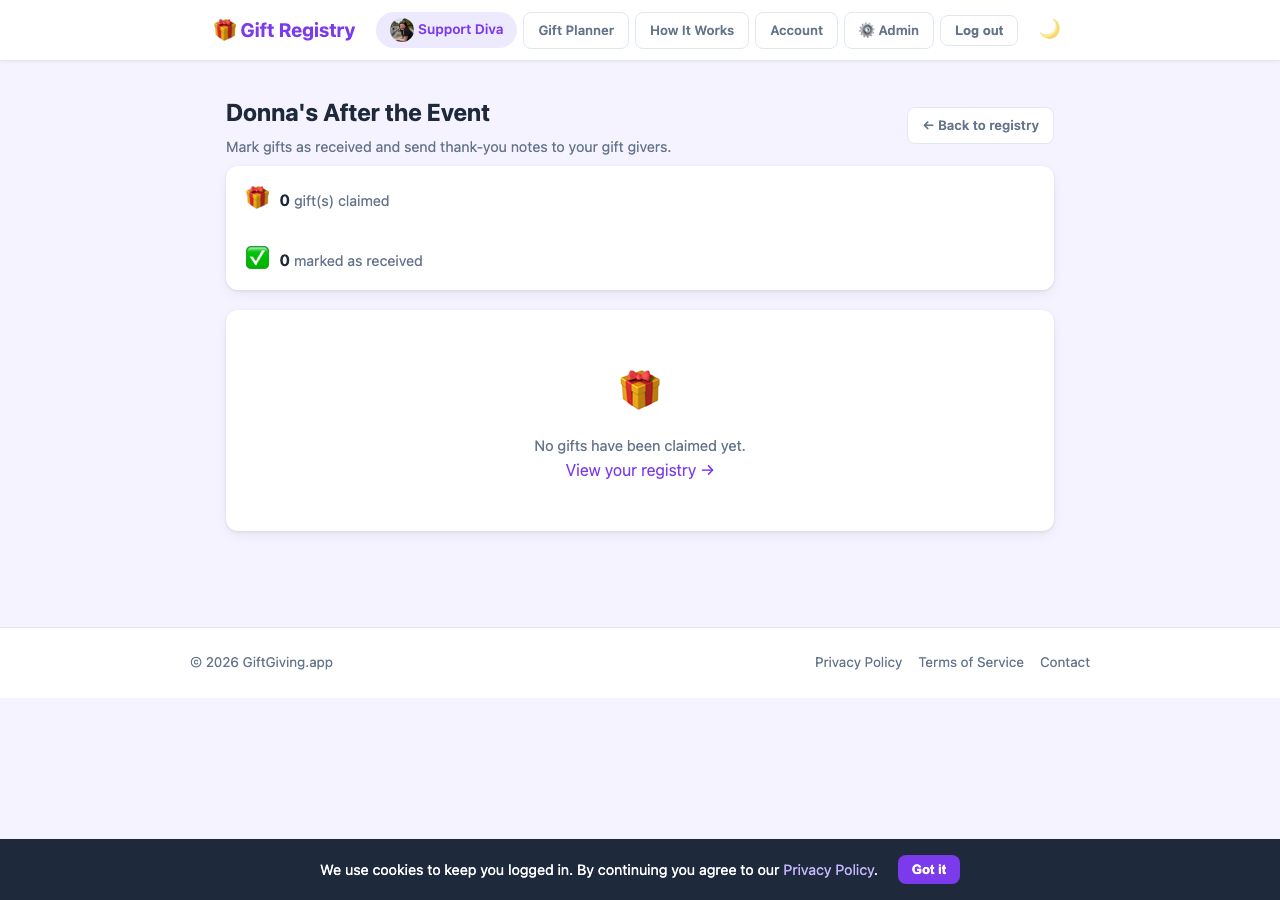
After the Event view: track received gifts and send thank-you notes from one place.
🖨️ Print & PDF export
Want a physical copy of your registry to hand out at an event, or a PDF to email to relatives who aren't online? One click does it.
-
1Click "Print / PDF" on your registry page
The 🖨️ Print / PDF button appears in the owner toolbar at the top of your registry. Click it to open your browser's print dialog.
-
2Choose "Save as PDF" or send to a printer
In the print dialog, select Save as PDF to get a file you can share digitally, or choose a physical printer to produce a paper copy.

The 🖨️ Print / PDF button sits in your owner toolbar — one click to get a print-ready or PDF version of your registry.
🔔 Push notifications
Get an instant browser notification the moment someone claims a gift from your registry — no need to keep the page open.
-
1Go to your Account page
Sign in and visit your Account page. Find the 🔔 Notifications card.
-
2Enable notifications
Click Enable gift notifications. Your browser will ask permission — click Allow. You'll see a confirmation that notifications are active.
-
3Get notified instantly
When someone claims a gift, a push notification pops up on your device even if the site isn't open. Disable at any time by returning to the Notifications card.
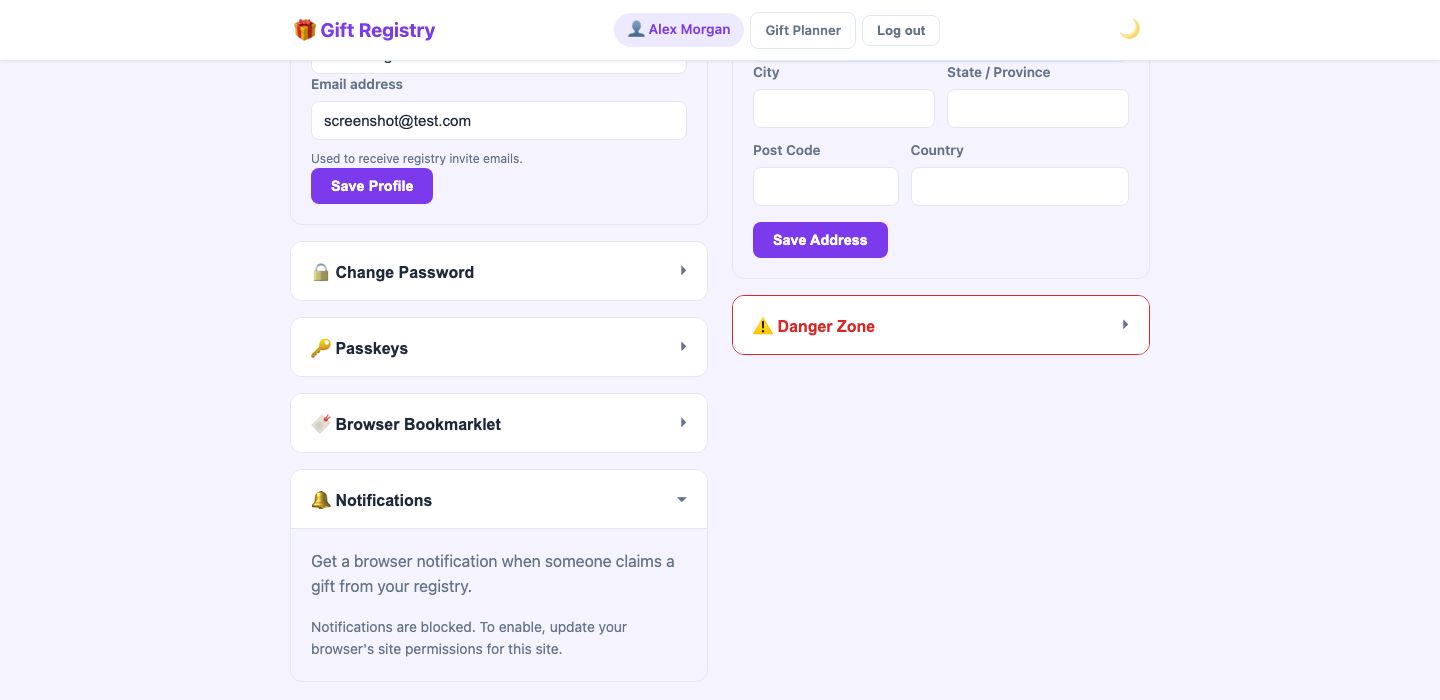
The Notifications section in Account settings — enable browser push notifications to get instant alerts when gifts are claimed.
🔑 Passkeys — sign in without a password
Passkeys let you sign in with Face ID, Touch ID, or Windows Hello — no password to remember or type.
-
1Sign in once with your password
Log in normally the first time, then go to your Account page.
-
2Register a passkey
Find the Passkeys card and click + Add a passkey. Your device will prompt you for Face ID, Touch ID, or your PIN to save the passkey securely. You can add one passkey per device.
-
3Sign in with a tap
Next time you visit the login page, click 🔑 Use a passkey. Your device will prompt you for Face ID or Touch ID and you're in — no password needed.
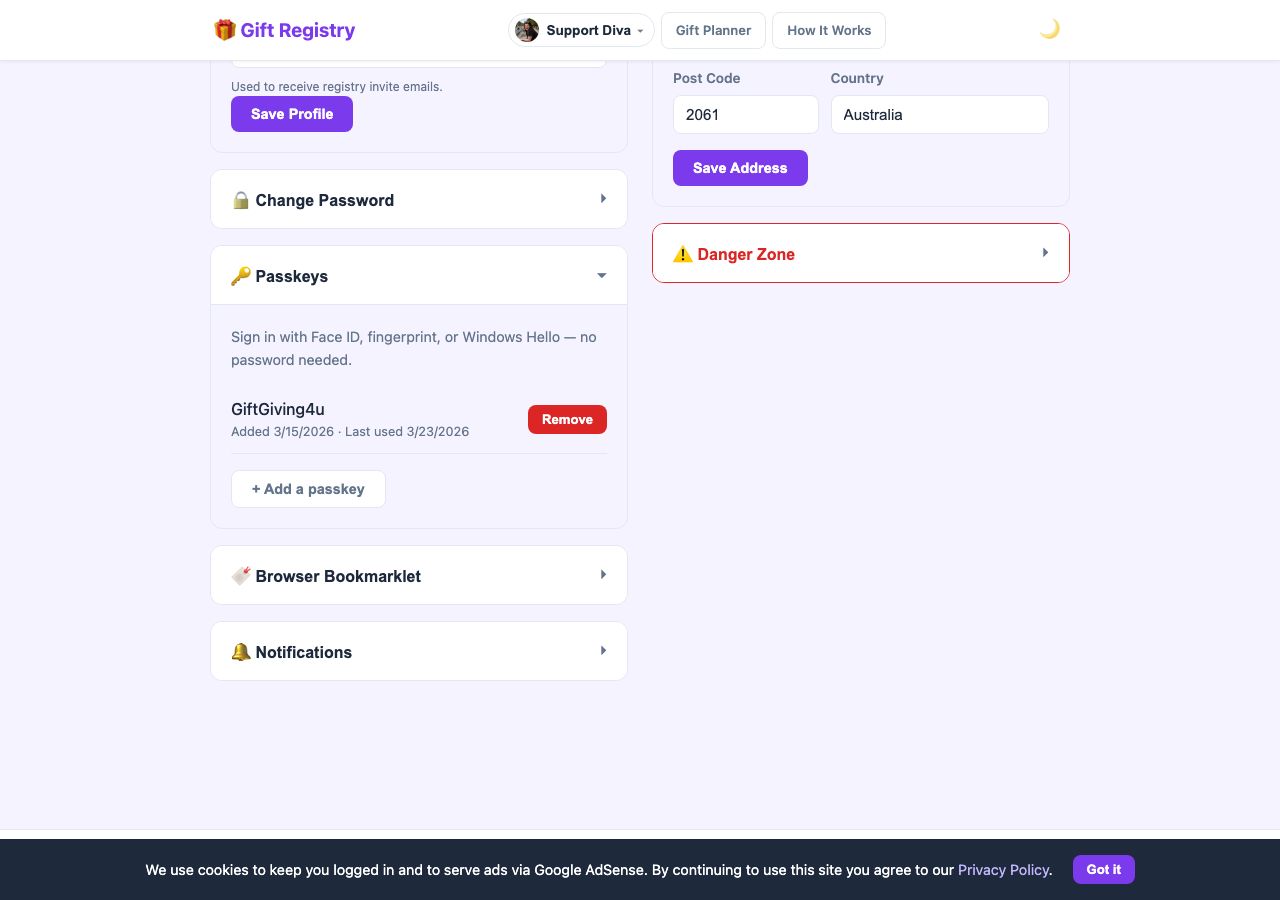
The Passkeys section in Account settings — register once per device for instant biometric sign-in.
✉️ Inviting people to your registry
Send a personal invitation to anyone you'd like to access your registry — they'll receive a direct link by email, and the registry will appear in a dedicated section on their homepage.
-
1Open your registry settings
Go to your registry page and open the Settings panel (or Privacy & Access).
-
2Enter an email address
Find the Invite someone by email field and type the guest's email address, then send the invite.
-
3Your guest receives an email
They'll get an email with a direct link to your registry — no searching required.
-
4The registry appears in their "Invited" section
When they sign in to Gift Registry, your registry shows up in an Invited section on their homepage — even if the registry is private.
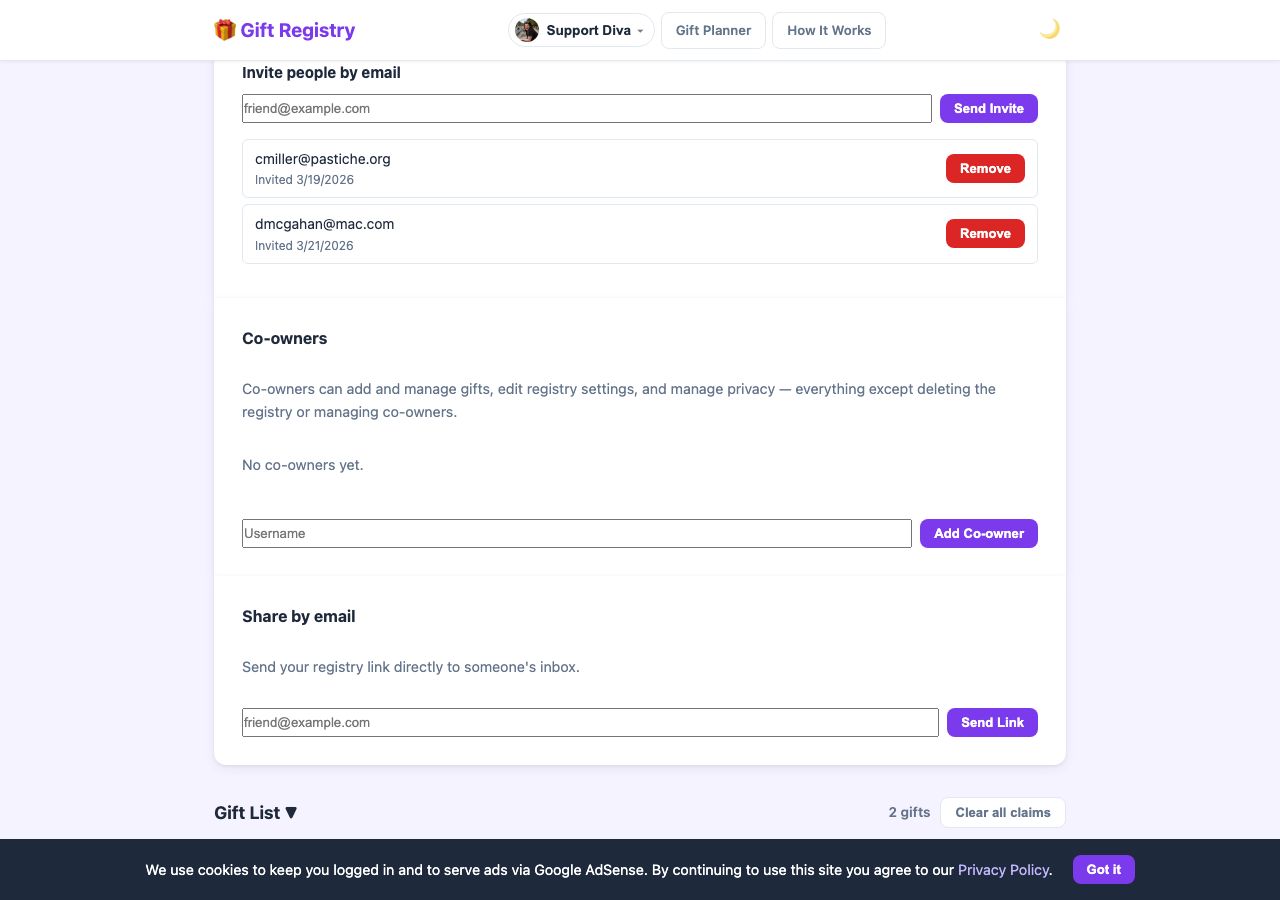
The Settings panel: invite guests by email, add co-owners, and share directly from one place.
🔍 Finding a registry
If you've been invited to someone's event but can't find their registry link, you can search for it by name directly from the homepage.
-
1Go to the homepage
Visit giftgiving.fun — no account needed.
-
2Scroll to "Looking for someone's registry?"
There's a search box near the bottom of the page — type the person's name.
-
3Click the matching registry
Results appear as you type, showing the owner's name and occasion. Click any card to go straight to the registry.
♥ Following a registry
Follow a registry to be notified whenever the owner adds new gifts — useful if you want to stay up to date without having to revisit the page manually.
-
1Sign in and open a registry
You need a free Gift Registry account to follow registries. Open any registry you have access to.
-
2Click the ♥ Follow button
On the registry page, click the ♥ Follow button (next to the Share Link button). You can also follow directly from the registry card in your homepage's Invited section.
-
3Get notified when new gifts are added
Whenever the registry owner adds a new gift, you'll receive an email notification — so you're always first to see what's on the list.
-
4Find followed registries on your homepage
All registries you follow appear in a Following section on your homepage for quick access. Click Unfollow at any time to stop receiving notifications.
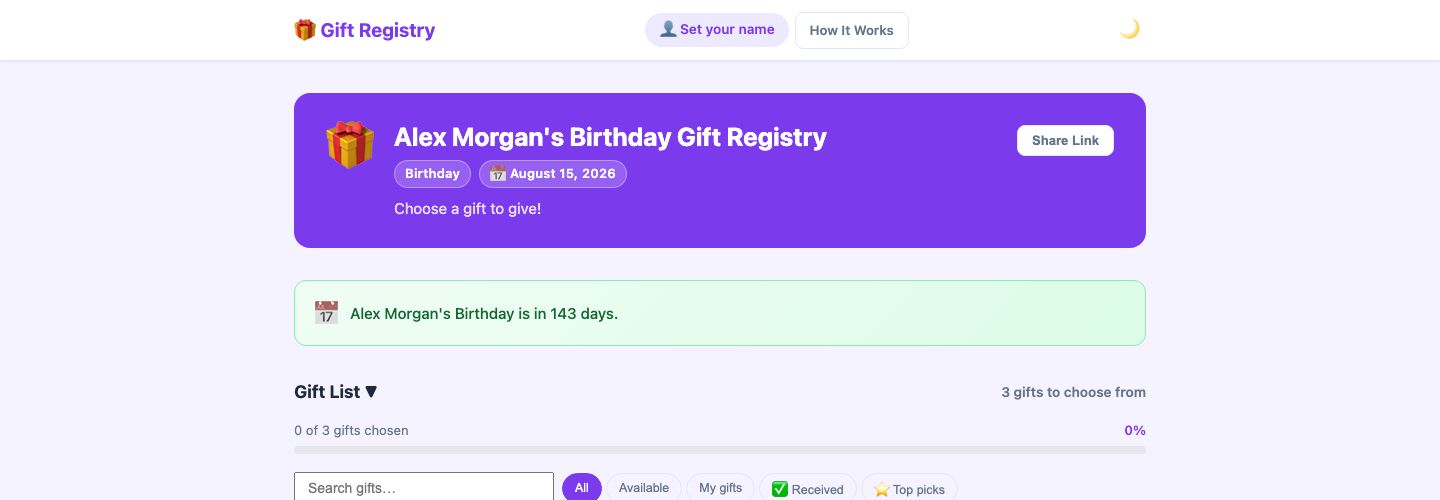
The guest view of a public registry — logged-in guests see a ♥ Follow button to subscribe to new gift notifications.
📧 Share via Email
Send your registry link directly to friends and family by email — no copy-pasting needed. The 📧 Email button in the owner toolbar opens a modal where you can add one or more addresses and send in one go.
-
1Click 📧 Email in the owner toolbar
The button appears alongside Share Link, Copy Message, Social, and QR Code at the top of your registry page.
-
2Add recipients
Type an email address and press Enter or , to add it as a chip. You can add as many addresses as you like. As you type, registered Gift Registry users are suggested by name or email in a dropdown — select one to add them instantly. You can also paste a comma-separated list (e.g.
alice@example.com, bob@example.com) and all addresses are added at once. -
3Click Send
Each recipient receives an email with a direct link to your registry — no searching or copy-pasting required on their end.
📦 Shipping address
-
1Add your address in registry settings
Open your registry and click ⚙️ Settings. Scroll to the Shipping address textarea and enter the address where you'd like gifts to be sent, then save.
-
2Guests see a "Send gifts to:" box
Once set, a 📦 Send gifts to: panel appears on the registry page for guests so they know exactly where to send purchases — no awkward asking required.
-
3Address included in claim emails
When a guest claims a gift, the confirmation email they receive automatically includes the shipping address, so the delivery details are right there when they're ready to buy.
❓ Common questions
Yes — completely free. There are no subscription fees and no premium tiers. Create as many registries as you like, add unlimited gifts, and share with as many people as you want. It costs nothing.
Gift Registry works with any online store — Amazon, Etsy, IKEA, Target, Kmart, The Iconic, Myer, David Jones, Wayfair, and thousands more. If a product has a URL, you can add it. You're never locked into a single retailer.
Absolutely. Gift Registry supports any occasion — weddings, baby showers, birthdays, Christmas, graduations, housewarmings, and anniversaries. You can choose an occasion when creating your registry and get a curated list of template gifts to get started quickly.
Retailer registries (Amazon, Target, Zola, The Knot) lock you into their store. Gift Registry works across any store — mix gifts from anywhere on the web in one list. The other key difference: guests claim gifts anonymously, so the registry owner never knows who bought what, keeping surprises intact right up to the event.
Yes — claimed gifts are clearly marked so two people don't accidentally buy the same thing. But the registry owner never sees who claimed what. Only guests can see that a gift is taken; the owner just sees their full list with no claiming information at all.
No. Just open the registry link and enter your name. No sign-up required.
Yes! When you import a product URL, a photo is added automatically if the page supports it. You can also paste any image URL into the Image field when adding or editing a gift.
Some sites (like Etsy and Amazon) block automated access. If the import comes back empty or incomplete, fill in the details manually and paste an image URL if you'd like a photo.
If you need to unclaim a gift, ask the registry owner to remove and re-add it. Claims that haven't been marked as purchased are also automatically released after 90 days, so gifts don't stay locked forever by abandoned claims.
A group gift is one where multiple people contribute rather than a single person buying it outright. Gift Registry doesn't handle payment — contributors coordinate outside the app (group chat, bank transfer, etc.). The registry just tracks how many people have signed up to chip in.
No. The owner only sees the number of contributors — never their names. The surprise is still safe.
Guests tap the fund's Contribute button, pick an amount ($25 / $50 / $100 or their own), and pay you directly: a PayPal button opens with the amount pre-filled, a Stripe link opens its checkout, or for PayID they copy it into their own banking app and transfer. They then tap I've sent it ✓ to nudge the progress bar along. The money goes straight to your PayPal or bank account — Gift Registry never touches it, which is how there are 0% fees.
It works on most shopping sites. The panel auto-fills the product name, price, and image using standard metadata that most sites provide. On sites that don't publish this info, the fields will be empty or partially filled — you can always type in the details yourself before clicking Add Gift.
Yes. The bookmarklet connects to Gift Registry using a private token tied to your registry. Nobody else can add gifts to your registry without that token. If you ever suspect your bookmarklet has been shared, you can generate a new one from your Account page (this will also invalidate any existing bookmarklets for that registry).
They do the same thing — add the product you're viewing to your registry in one click. The Chrome extension installs from the Chrome Web Store, sits permanently in your toolbar, and reuses your normal login (no token to manage). The bookmarklet needs nothing from a store and works in any browser, including Safari and Firefox. Use whichever you prefer.
No. The owner only sees their list of gifts with no claiming information at all — completely spoiler-free.
Your name is stored on your current device. On a new device, you'll be asked for your name again — just enter the same name you used before and your claimed gifts will still be recorded correctly.
Use the My Gifts page. It shows everything you've claimed and lets you tick off each one as you purchase it. Or use the Gift Planner to organise gift ideas for multiple recipients before you've claimed anything.
Yes! The primary owner can add a co-owner by username via the Privacy & Access panel. Co-owners can add and edit gifts and update settings — perfect for couples or parents sharing a baby shower registry. See Co-owned registries above.
Yes — if you set an event date on your registry, reminder emails are automatically sent to the owner, claimers, and private invitees at 30 days and 7 days before the event. No setup required beyond setting the date.
Yes. On the login page click Continue with Google to sign in with your Google account — no separate password needed. If it's your first Google sign-in, an account is created automatically using your Google email address.
Yes. Gift Registry follows your device's dark mode setting automatically on first visit. You can also manually toggle between light and dark using the 🌙 / ☀️ button in the top navigation bar.
Yes — it's a Progressive Web App (PWA). On Chrome (Android/desktop) tap the install prompt or the menu → Install app. On Safari (iOS) tap the share icon → Add to Home Screen.
🗂️ Inactive registries & account cleanup
Gift Registry automatically tidies up unused registries and empty accounts to keep things running smoothly. Here's what happens and when.
Registry inactivity
A registry is considered inactive if it hasn't received any guest views and no gifts have been claimed.
- 5 weeks of inactivity — the registry owner receives a heads-up email so they know the registry exists but hasn't been visited yet.
- 8 weeks of inactivity — the registry is automatically deleted. You'll have received the warning email at the 5-week mark, giving you plenty of time to share the link or make the registry active.
Registries with an upcoming event date set are never auto-deleted — the cleanup only affects registries with no future date attached.
Abandoned account cleanup
If an account has no registries and no gift plans and hasn't been active for 60 days, it's automatically deleted. You'll receive an email notification just before your account is removed.
This only affects truly empty accounts — if you have even one registry or gift plan, your account is never touched by the automated cleanup.
🌐 Social sharing
Share your registry on Twitter/X or Bluesky directly from your registry page — one click opens a pre-filled post with your registry link ready to go.
Sign in and go to your registry page. Social sharing buttons appear in the owner toolbar at the top of the page.
Find the 🌐 Social ▾ dropdown button in the owner toolbar and click it to reveal the sharing options.
Select 𝕏 Share on X or 🦋 Share on Bluesky. A new tab opens with a pre-filled post containing your registry link — edit the text if you like, then post.
The 🌐 Social ▾ dropdown — share your registry to WhatsApp, iMessage, Twitter/X, or Bluesky in one click.